Welcome back to my story on becoming Captain Barnacles. As my previous post described, I had decided that a large paper mache head would be required. Seeing as my last paper mache creation was a rather crappy fruit bowl back in high school, I realised some assistance would be required. Thankfully this time the internet provided. Here are some helpful resources I found:
 |
| Thankyou internet. |
I used white PVA glue because I didn't want to mess around with flour and water. I would recommend buying the cheap generic version as Aquadhere gets expensive.
 |
| For hanging, not wearing |
Thanks to this mom-blogger for ideas on how to create the head in a Captain Barnacles style.
 |
| Thankyou sir |
The first layer took ages. I used the traditional method of dipping strips of paper into a bucket of glue, squeegeeing them out using my fingers, then spreading them on with my hands. This was messy, slow, and left drips of glue everywhere. I quickly decided that this method was for fools and went searching for a better one. This YouTube video shows exactly that - using a brush to paint the glue on and also to pick up the paper strips. It's much faster and neater as well. Check it out!
 |
| Thankyou too. |
This guy had a really useful tip on how to attach the big giant head to your own slightly less giant head - namely, a bicycle helmet tied to a big block of foam. This was really helpful as I was wondering how I was going to put the thing on my head without it tilting and falling off.
Tricks and Steps
Here's a brief summary of how I went about it.
1. Get a giant balloon.
 |
| Head |
2. Paint on the glue with the brush, then paint on strips of paper and paint glue over them. Tips:
- If you add a bit of food colouring to the glue, you can see where you have painted.
- If you alternate layers of differing types of paper, it will be easy to see where you have gone.
- If you make the last layer a layer of white paper it will be much easier to paint.
- Use a bucket to stop the thing rolling away.
Allow each layer to dry overnight before starting the next layer. The number of layers you do should depend on how strong you will need it, however will likely more depend on how much time you have left before the item is needed. I only managed three layers, which for a giant head is probably the minimum. A few more layers would have stopped it caving in (which it did a bit) but was mostly OK.
 |
| Painting for fun and not much profit |
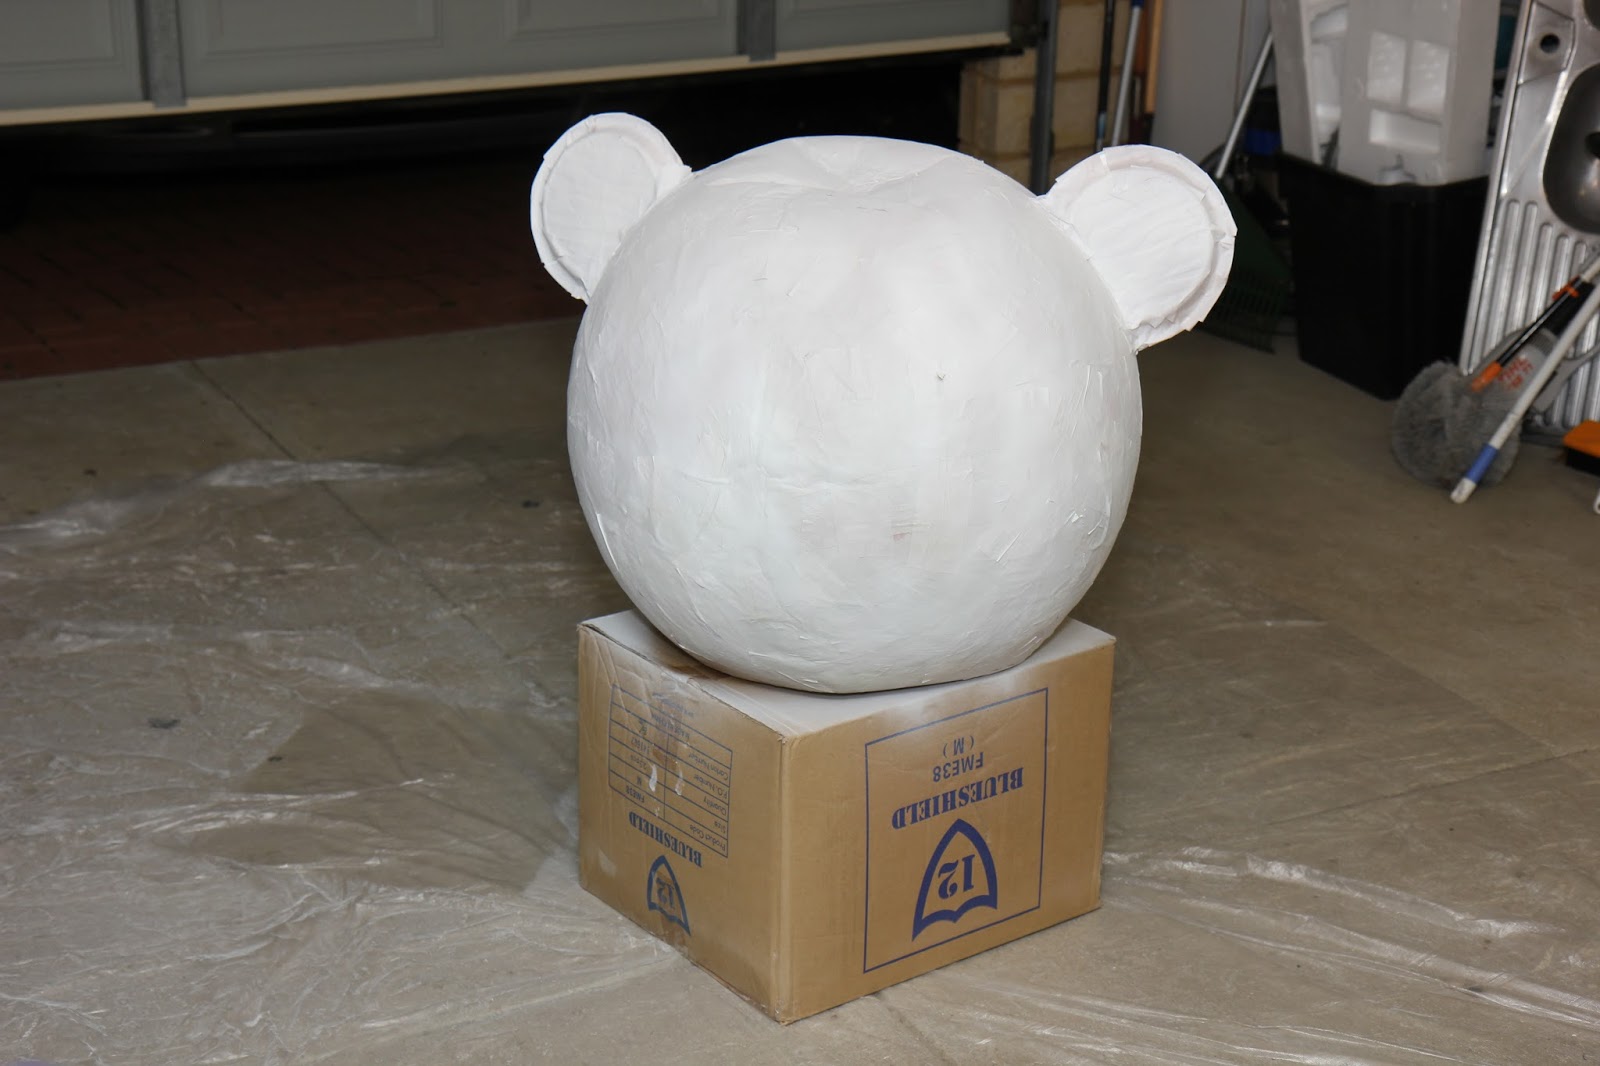
3. As part of your last layer, cut a section out of two plastic plates and tape them to sides as ears. Mache over them.
 |
| I hear you now. |
4. Cut the bottom open and peel out the balloon. It will make a cool sound as it peels and shrinks.
 |
| Thing |
 |
| Captain Barnacles chillin' |
6. Tie your bike helmet to a block of foam. As you can see, this was a $4 off-cut from Clark Rubber. Something that was not explained on the link above was how to actually get the twine to go through the block of foam. After thinking about this for a while, I used a bike spoke. The spoke will easily punch through the foam and you can use the little hook on the end to pull the twine through. I suppose you could try with knitting needles too.
 |
| Poking through |
 |
| This is a helmet attached to block of foam. What? |
 |
| Looking ridiculous |
7. Start packing the head with paper, put the foam block in place and then pack more paper around it. Then try it on your head. You will probably need to adjust the location and amount of paper to get it right. A helpful spouse or bystander will be useful at this point to tell you if it's on straight. An unhelpful spouse or bystander will just tell you that you look ridiculous so feel free to poke them in the ribs later.
 |
| Helmut |
 |
| Ask the Bunnings worker for "polar bear white" and then film their reaction. |
If you are in a hurry, a hairdryer will help speed up the process
 |
| "Are you feeling like the outcome of random events will be in your favour, punk? Well, are you?" |
 |
| Mouth |
10. The end result. The hat is made from some blue cardboard, and adorned with an Octonauts logo I printed out.
 |
| "Ready for action" |
Then, just transport the big giant head to the event, gather the other items and you're ready to go!
 |
| "Yes occifer I acquired this legally" |
To finish it off, use the boots, overalls, belt and gloves detailed here. I covered the belt in blue cardboard, which was a lot easier than painting it. I also made a collar from cardboard as well, which served to hide my neck.
Note that I have also gone around the outline of the non-black areas with a black marker, which helped them stand out a bit and look less messy.
The end result:
 |
| "Octonauts, to the launch bay!" |
 |
| One happy boy |
 |
| Off on an adventure |
The Act
- Do your research and watch a few episodes of The Octonauts while you are making the head, to make sure you get well into character.
- If you have an "Octo-alert" from the children's play set, it will help you make some authentic sounds
- Make sure you walk and talk in a commanding, confident way. Captain Barnacles always keeps his cool.
- If you have a treasure chest or similar and fill it with chocolate coins, you can go searching for Calico Jack's Lost Treasure.
If anyone else is mad enough to try this, please let me know how it went.
Also, does anyone want a big giant Captain Barnacles head? I'm not sure where to put it. The pool room?
2 comments:
I actually followed your instructions, and had my 6 year old daughter become Peso for my son's 3rd birthday. Thanks for the useful and helpful post! I would post a picture but I don't know how to.
Great! Thanks for the comment. Hmmm, I don't think you can leave photos in the comments. If you like, send it to peter&jess@gmail.com (but first replace the "&" with "and") and I'll add it to the post. :)
Post a Comment